
I love Pinterest. It’s a mecca for great ideas, style and design. It’s also a perfect outlet for daydreaming about what you’d look like, how you’d live and what you’d do in an imaginary world.
Um hello please let’s eat fresh muffins there one day, and yes I’d like to play my flute in a pretty room like that for you, and oh I’d get so much more done in a day if I woke up in a bedroom like hers. Can you blame me?
Pinterest is just so tempting! It has a way of empowering you. It makes you imagine anything is possible. Sometimes, I get a little too excited and actually believe it. When I see something online that a little part of me believes I can recreate, I have to make it. A tiny spark gets ignited that I just can’t put out. I get obsessed.
This unrestrained enthusiasm AKA naïveté usually ends up a little like this:
Pinterest Attempt:
7: Chickadees

NAILED IT!
Their ducky eyes are all wibbly :( The homemade chicks just look upset or something.
(Chickadees from this hilarious Pinterest BuzzFeed article)
I had a similar Pinterest FLOP experience this past weekend.
A couple weeks ago, my friend posted a pretty picture on Pinterest of some gorgeous heart-shaped sugar cookies with stamps of words like “I love you” and “XOXO” on their centres.
This is what her Pin looked like, posted from Kelsey’s Kitchen:

My heart did a little flip flop and I wanted to make them. Needed to.
At the time, Valentine’s was just around the corner, and that was a good enough of an excuse for me to dive right in.
I soon found myself in William’s Sonoma to see if the special cookie cutter Pinterest recommended was in stock. I felt a little sheepish poking around the overpriced gadgets at Wiliams Sonoma, and even more so when I came across the exact cookie cutter I was guiltily hunting down. Soon enough the special heart-shaped cookie cutter was gracefully resting on my counter top at home, patiently waiting to be used.

The cookie cutters sat unused on my countertop for a week. Then Valentine’s passed. They got a little dusty. When I finally remembered I owned gorgeous heart-shaped cookie cutters (last weekend, after Valentine’s), I meeped a little, hopped right to it and decided to bake a batch of cookies for a potluck party that Sunday night. Shmeh lateness! People would love them even though Valentine’s had passed.
The recipe looked simple, and like something that could be whipped up with a pantry of basics. Easy, right? No problem!
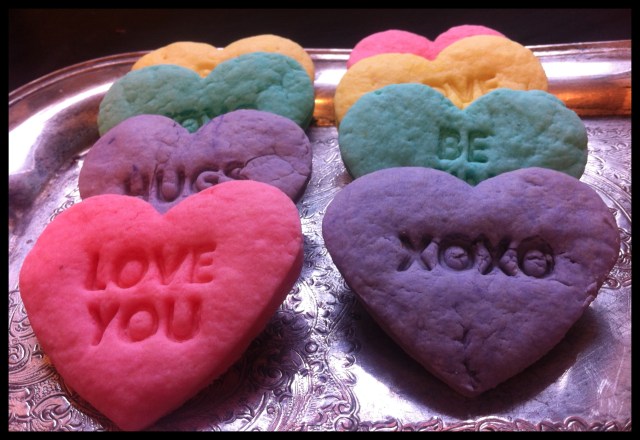
I was flabbergasted when this was how my cookies turned out:

NAILED IT
Darn Pinterest you got me again!
How embarrassing. I followed the recipe to a T, yet the cookies turned out extremely poofy (odd!), starchy and had burned bottoms. Poor cookies. I had such high Pinterest hopes for them.

My dinner party friends were sweet and still ate my potluck offering. They also earnestly gave wide-eyed compliments for the sad looking cookies they munched on. I harrumphed a bit, and scrunched my nose in the direction of the cookie platter. It was not the end of my battle with those little guys.
My big-potluck-cookie-flop made me determined to get things right with a second try. Remember I told you I get a little obsessed? How hard was baking sugar cookies after all? I would attempt them again and alter that darned Pinterest recipe until I got it right for goodness sake!

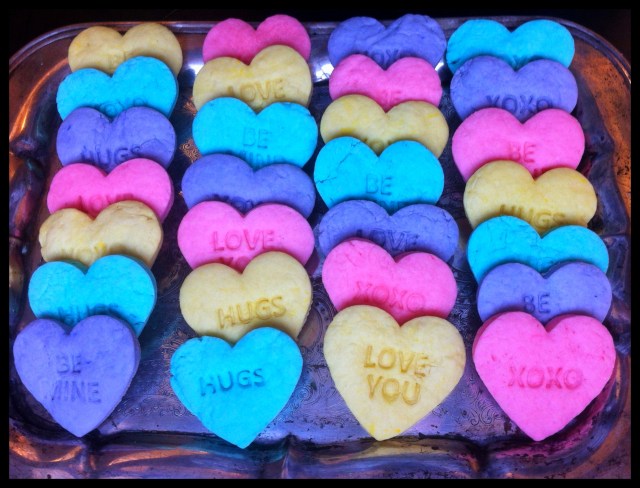
Voilà I did it! Here is my finalm altered recipe for the gorgeous Pinterest sugar cookies: (Well it’s close enough) :)

Heather’s Sweethearts
(not Kelsey’s because those didn’t work .. Still feeling bitter! Sorry.)
1 cup butter, softened
2 cups & 2 tbsp icing sugar
2 eggs
8 oz sour cream (~ 1 cup)
1 tsp vanilla
1/2 tsp salt
1/2 tsp baking soda
4 tsp baking powder
approx 4 1/2 cup flour
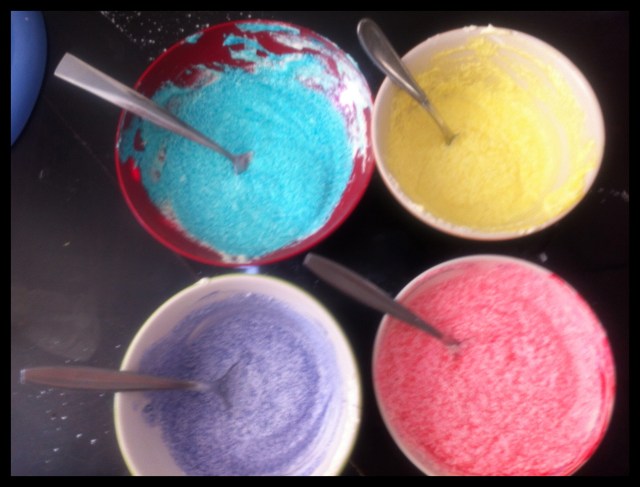
Smidgen of 4 food colouring gels:
I used: Sky blue, rose pink, sunshine yellow
and lavender purple.
Heart shaped stencils: available at
Williams Sonoma in Canada and US
Directions
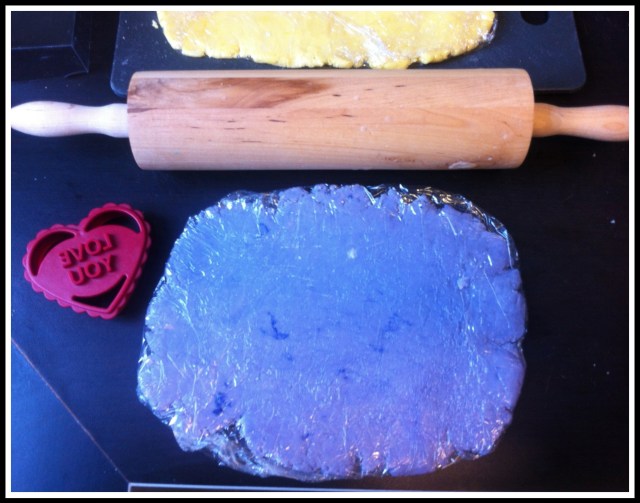
1. Cream butter in a stand up mixer. Sift icing sugar into creamed butter. Add remaining wet ingredients; eggs, sour cream & vanilla and mix until blended. 2. Divide wet ingredients into 4 small bowls by portioning 3/4 cup of wet mixture into each bowl. This should evenly distribute wet mixture into each bowl. Add desired food colouring to each portion and mix until blended. 3. In a separate medium bowl combine salt, baking soda, baking powder and flour. Whisk dries together to combine and to fluff up. 4. Scoop exactly 1 1/4 cup of dry mixture into each portion of coloured wet ingredients. If there isn’t quite enough dries to go around, add a little more flour to the last bowl you get to to gain the right consistency. Slowly mix together wets with dries in each individual bowl until mixture forms dough, then shape dough into four little balls. Don’t over mix. 5. Spread a sheet of saran wrap on counter and dust with flour. Drop dough onto saran, working with each dough ball individually. 6. With rolling pin, roll dough to 1/4 inch and seal a flat of dough with saran wrap. Chill each package of coloured dough on baking sheet for one hour or more. You can stack the dough flats. 6. After an hour of chilling in the fridge, preheat oven to 350 degrees F. Unwrap each dough package individually and work with dough flats one at a time. Roll and smooth dough to about 1/8-1/4 inch. Cut dough with cookie cutters and stamp letters on hearts while dough is still cool. Be careful not to mix colours. 8. Bake for 6-8 minutes or until bottom of cookies are golden. Keys to the cookies: Don’t over mix or over handle the dough. Roll the dough at least 1/4 inch thick and don’t overbake.The cookies turned out perfectly. They were subtly sweet, soft yet chewy, and had a hint of sour creaminess. They were delightful!
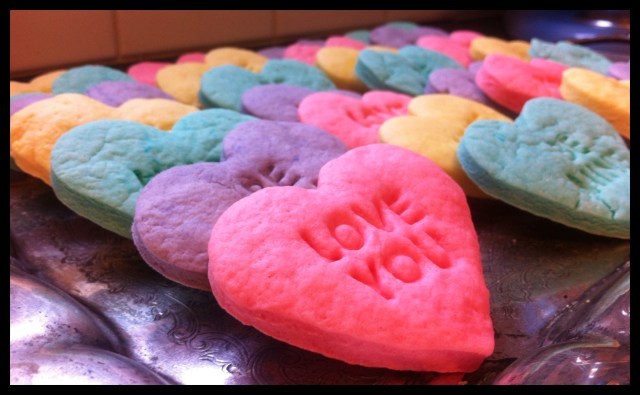
Here are some photos I took while making the cookies (the second time around!)

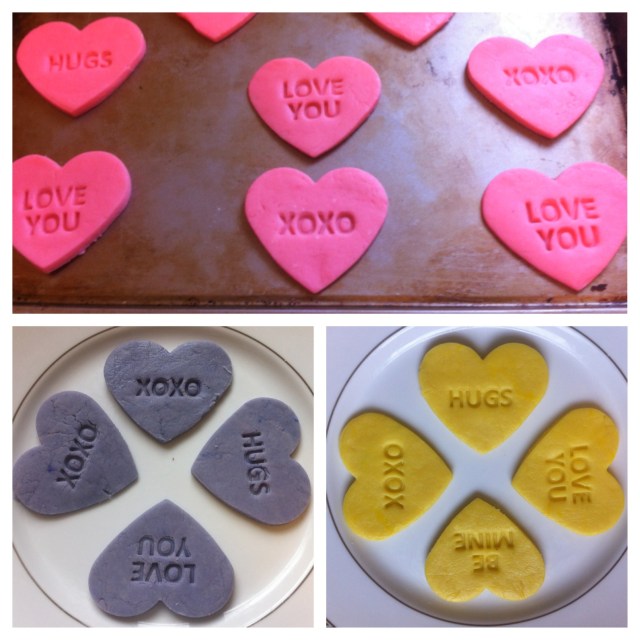


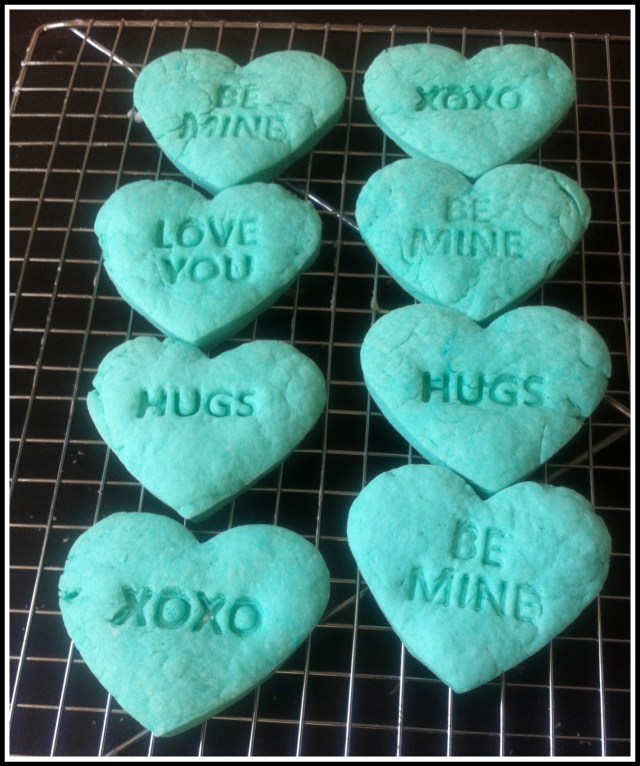
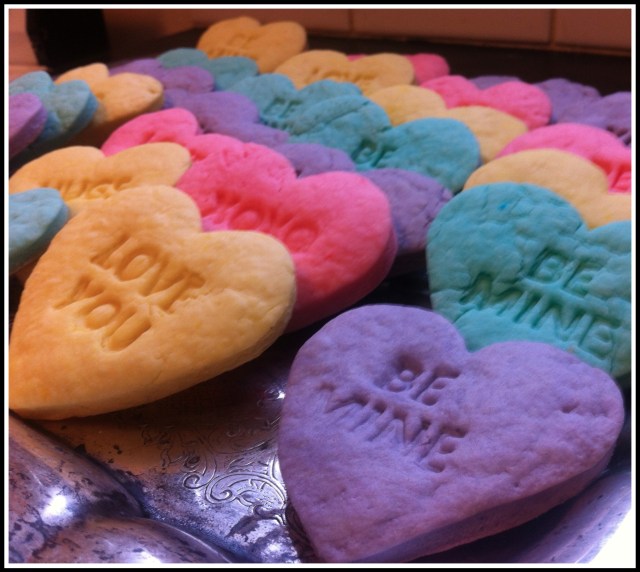


I feel like a cookie master. Trumped Pinterest. Take that!
I hope you all have an incredible day.
Love,
Heather


hahaha you are awesome :)
Where can I buy that mould?
ooops, it’s a cookie cutter :)
You can buy it at Williams Sonoma!
Pingback: White Velvet Cake | Blue Owl Treats
Pingback: Chocolate Dipped Doughnuts | Blue Owl Treats
Pingback: Blueberry Banana Almond Meal Muffins | Blue Owl Treats