
Do you have any recipes that are on your bucket-list? Are there any recipes that have caught your attention, sparked your curiosity or enticed your sweet tooth while flipping through a magazine or scrolling down a website? I have so many! I guess I am easily pleased by pretty things. If you look at my cookbook shelf, you can see a jillion little colourful post-its flagging my favourite pages, crying out “pick me, pick me” when I glance in their direction. Call me fickle, (I’m the same on Pinterest) but there are so many great baking ideas out there it’s hard not to collect them all and dream about bringing them to life.
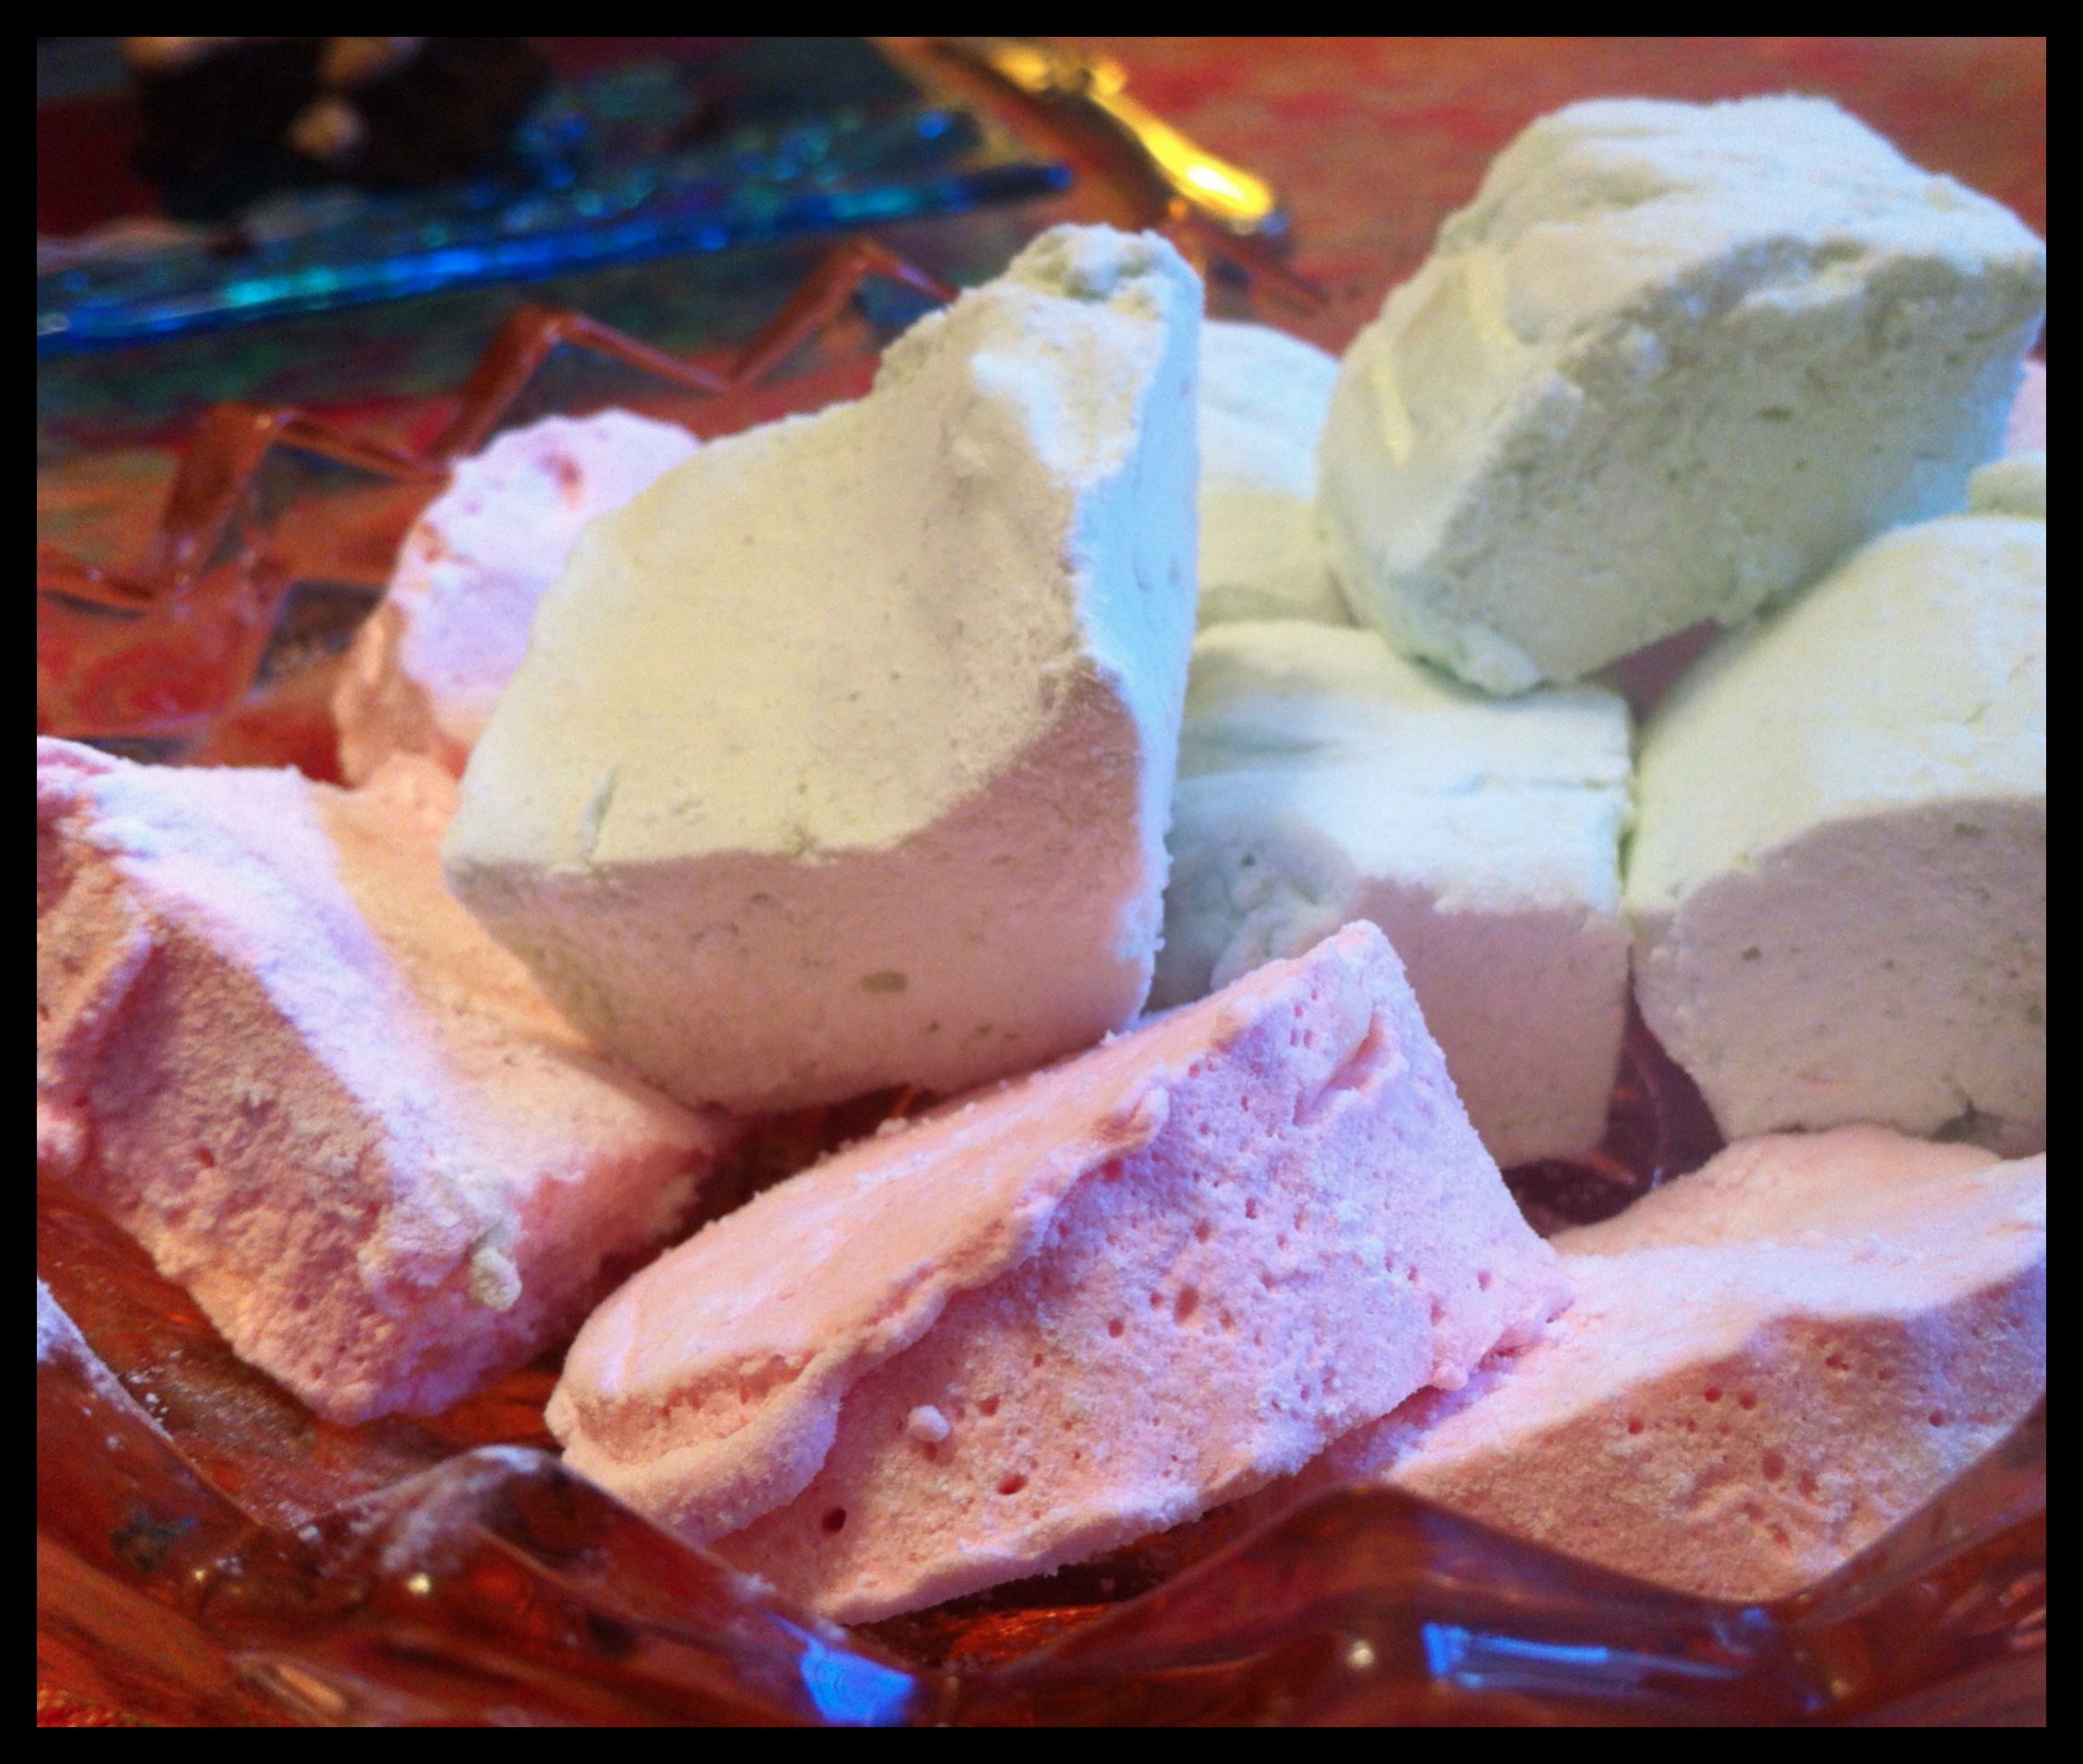
Well I finally got to you marshmallows, and how utterly fluffy, poofy, soft and billowy you are. What a delight it was to create these, to smell the sweet caramelization of the sugar while the mixture bubbled away on the stove, and to vigorously beat the egg white meringue until it was sky-high with fluff.
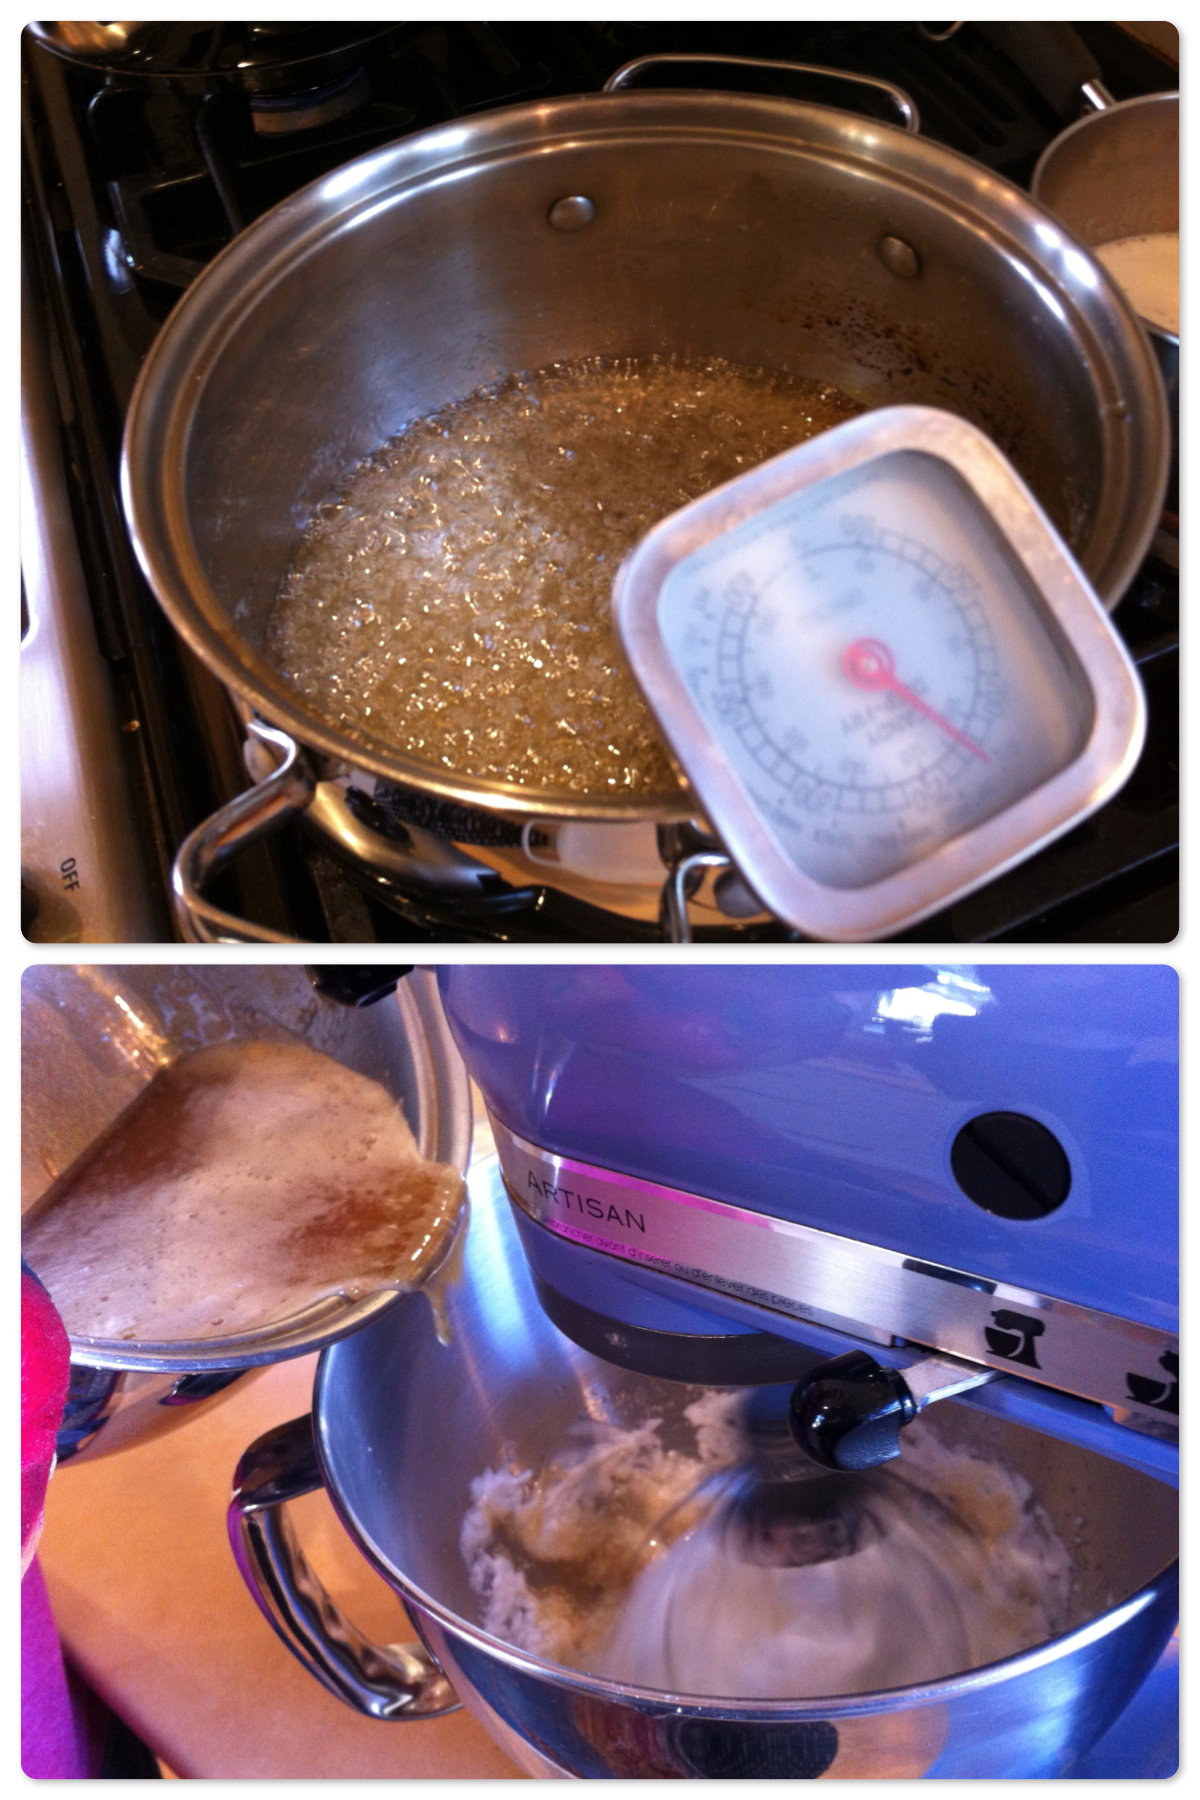
I was so lucky to have had some help making these marshmallows. After spending a sunny afternoon flying kites with my boyfriend’s sister and nephew, I got to head to the kitchen to spend some time with his mama. It was wonderful to have her guidance, especially since I’m a bit of a nervous candy-making señorita. Truthfully, I find the whole candy thermometer, high temperature thing a bit terrifying!

In my directions below, I have tried to keep things nice and clear for you, outlining the process so it is easy to follow (and not at all terrifying). There are a lot of steps yes, but that’s so I can hold your hand a bit along the way. Good luck, take a breath and dive on in to candy-land– this one’s a fun one!

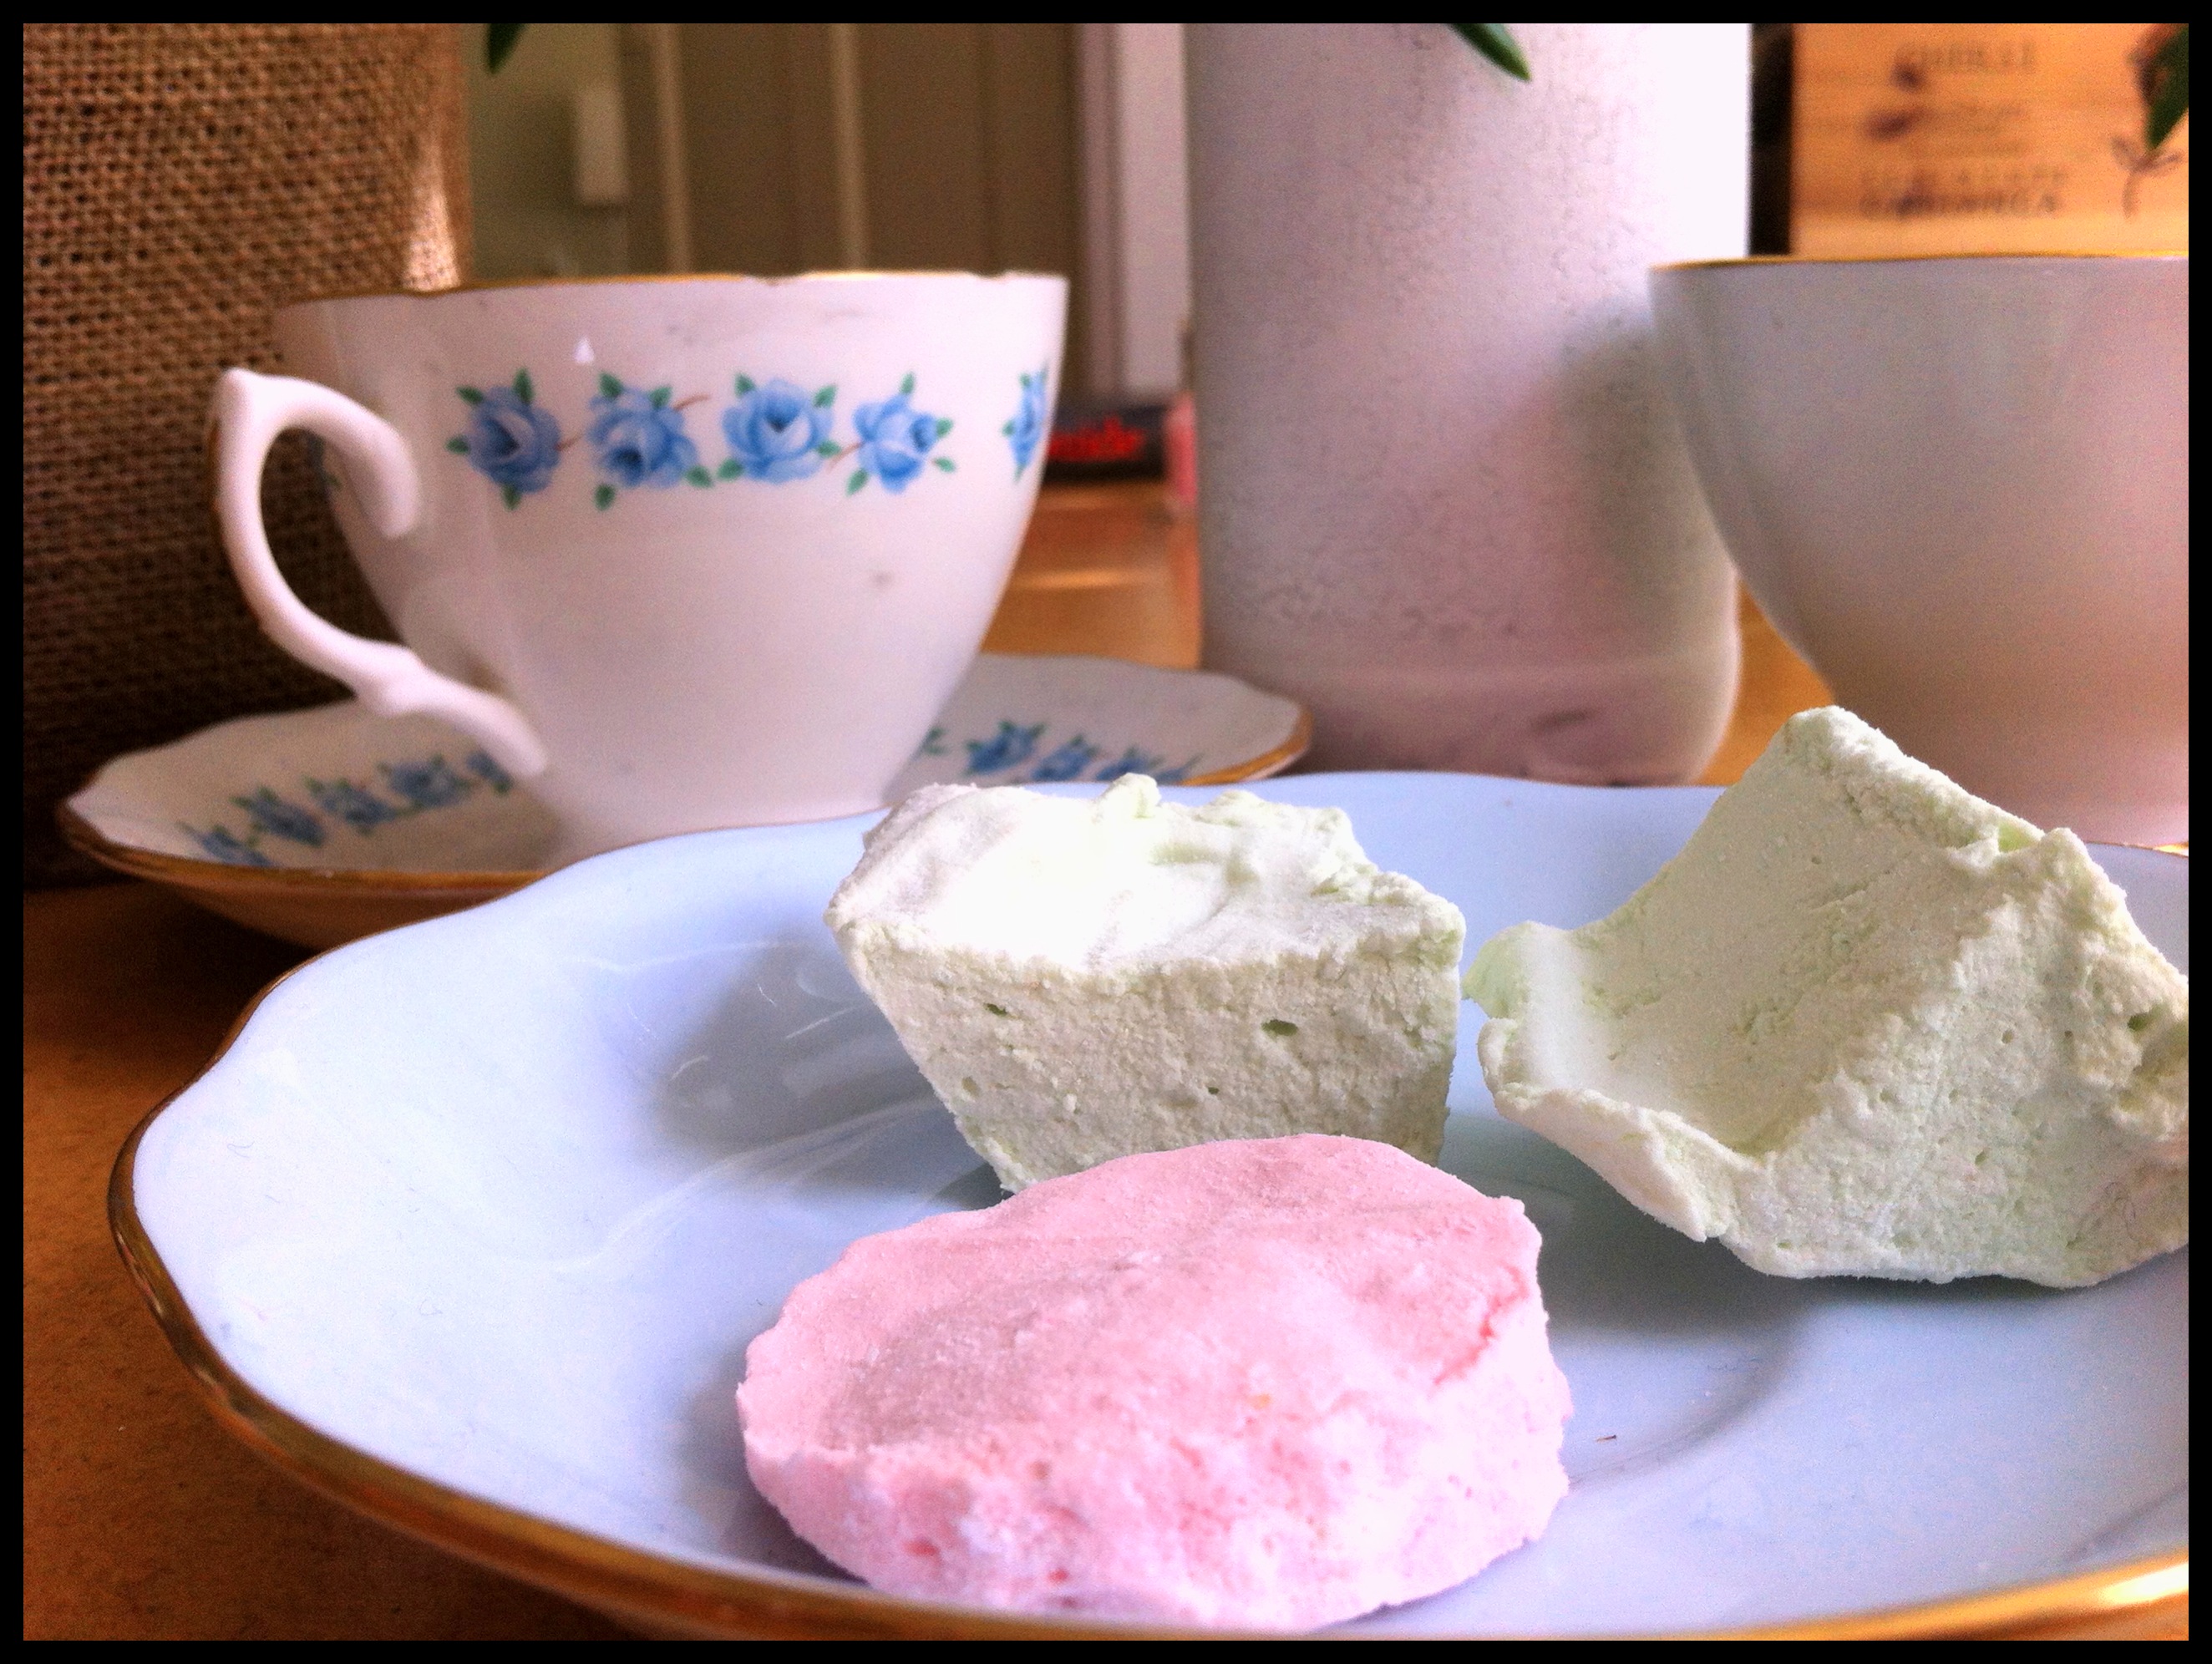
Peppermint Pastel Marshmallows
yield: Two 9×9 pans time: 40 mins prep, 2 hours set.
Supplies Needed:
Candy Thermometer
Two 9x9 pans
Two saucepans
Mixer (Kitchen Aid or similar preferable)
Ingredients:
2 cups sugar
3/4 cup water (x 2)
2 tbsp white corn syrup
4 pckgs unflavoured gelatin
2 egg whites
1/2 tsp peppermint extract
Icing sugar (for dusting)
Food colouring (red and green)
*Note: Read through recipe before attempting! This recipe requires the baker to do a couple things “at once”. No prob you say, what kind of baker isn’t good at multi-tasking? For those of you who get bamboozled easily (like me) hire a sous-chef :) 1. Butter two 9×9-inch baking pans and line with parchment paper. Lightly butter the paper and dust with some of the icing sugar. Set aside. 2. In saucepan, bring granulated sugar, 3/4 cup water and corn syrup to boil over medium-high heat, stirring just until sugar dissolves. Boil, without stirring but brushing down side of pan with pastry brush dipped in cold water until candy thermometer reaches 260°F (125°C), about 12 minutes. Remove from heat. Note: If your candy has been on the stove longer than 12 mins and hasn’t yet reached 260 F, try the hard ball test: Drop 1 tsp (5 mL) syrup into cold water. If the droplet forms hard ball that is only slightly squishy to the touch, the mixture is ready to be removed from heat. 3. While candy is bubbling on stove, sprinkle gelatin over 3/4 cup (175 mL) cold water in your second saucepan. Let gelatin mixture stand for 5 minutes. 4. After 5 mins is up, place gelatin saucepan on stove and heat mixture over low heat, stirring until mixture is somewhat clear (3 to 5 minutes.) 5. While gelatin is heating up on stove, quickly pour egg whites into stand-up mixer and beat with a beater attachment until stiff peaks form. 6. Turn your attention back to the gelatin mixture. When mixture is clear, whisk it into the hot sugar syrup, which should have just been removed from heat. (Mixture will bubble up.) 7. Remove candy mixture saucepan from heat and while stand-up mixture is on medium speed, gradually pour into egg whites. Beat mixture on high until mixture has increased in volume and cooled, about 12 minutes. 8. If you want two different pastel colours to your ‘mallows, divide mixture in half at this point. Quickly pour in 1/4 tsp peppermint extract and food colouring to each portion (I used pink and green) and whisk/beat until marshmallow mixtures have reached desired colour. 9. Immediately scrape marshmallow mixtures into prepared pans. Using greased palette knife or spatula, smooth top. Let pans stand, uncovered, at room temperature until firm and set, about 4 hours. 10. Remove from pan and peel off paper. Transfer to icing sugar–dusted cutting board. Using greased knife and cleaning and greasing knife between cuts, cut into 40 squares, trimming edges. OR cut with a small cookie cutter of your choice. Try heating the knife as well to aid in cutting. 11. Pat individual marshmallows with more icing sugar and store in tupperware until ready to serve! Store between waxed paper in airtight container at room temperature for up to 1 week.)

Serve your marshmallows with tea, in hot cocoa, roast them over a campfire, or package them up as a beautiful easter gift for a friend!
In light of this new season, and since spring is the time to dust out the closets and start anew, pick up that old, dog-eared cookbook you keep tucked away on your dusty bookshelf and give some of those long-admired recipes attention. Go for it, check off your bucket lists too!
Hint: This recipe’s a good place to start :)
Happy Easter, and happy mallow-making!
PS: Beware of mallow moochers. I left my tupperware of ‘mallows out and a muncher (boyfriend) got his paws sticky. They are too good to deny!


