
One of my favourite ways to pass time on a BC Ferries trip is to flip through glossy magazines in the ship souvenir shop. I am the sheepish kind of customer who likes to hover around the book aisle with no intention of purchasing a thing. I bet it’s infuriating! Last voyage, about mid way through the Georgia Strait, I fell upon a gorgeous magazine that made my heart pitter a bit.
It was Martha Stewart’s Cakes and Cupcakes magazine, fresh off the press. Incredible! Every confection within its pages looked delicate and divinely exquisite. Needless to say, that magazine was coming home with me.

The works of art that are Martha Stewart cupcakes.
Since Martha’s icings looked incredible in print, I decided to give her Swiss Meringue Buttercream frosting a try as my first “wanna be” attempt.
It turned out to be probably the best decorative icing I’ve ever used! It was so easy to work with, pipe and shape. Thank you Martha.
Swiss Meringue Buttercream
This ultra-smooth buttercream is apparently Martha’s go-to frosting, especially for piped designs.
1 1/2 cups sugar
6 large egg whites, room temp
2 cups unsalted butter, room temp
1 teaspoon vanilla
Smidgen food colouring
1. Whisk together sugar and egg whites in a double boiler. Whisk until warm and sugar is dissolved (should feel smooth when rubbed between two fingers.) 2-3 mins. Remove from heat.
2. With an electric mixer on medium speed, whisk egg-white mixture 5 mins. Whisk on med-high until stiff, glossy peaks form and meringue has cooled (about 6 mins)
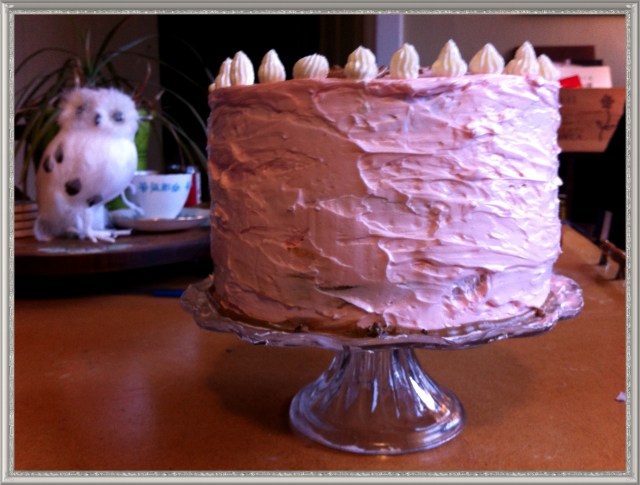
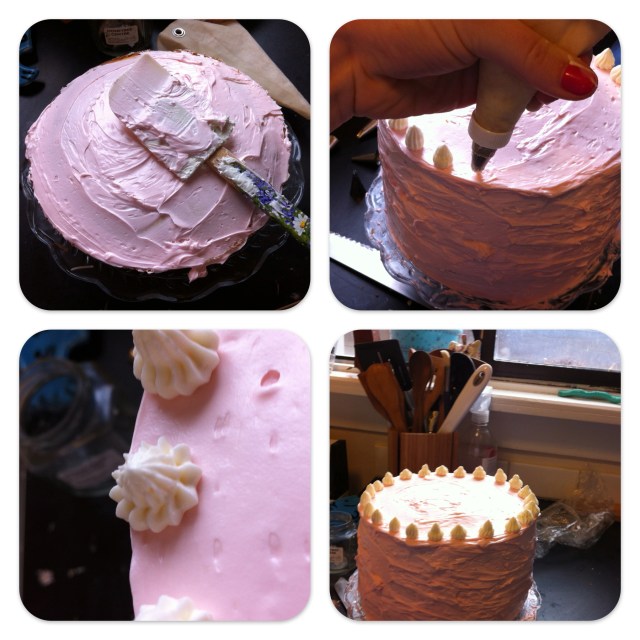
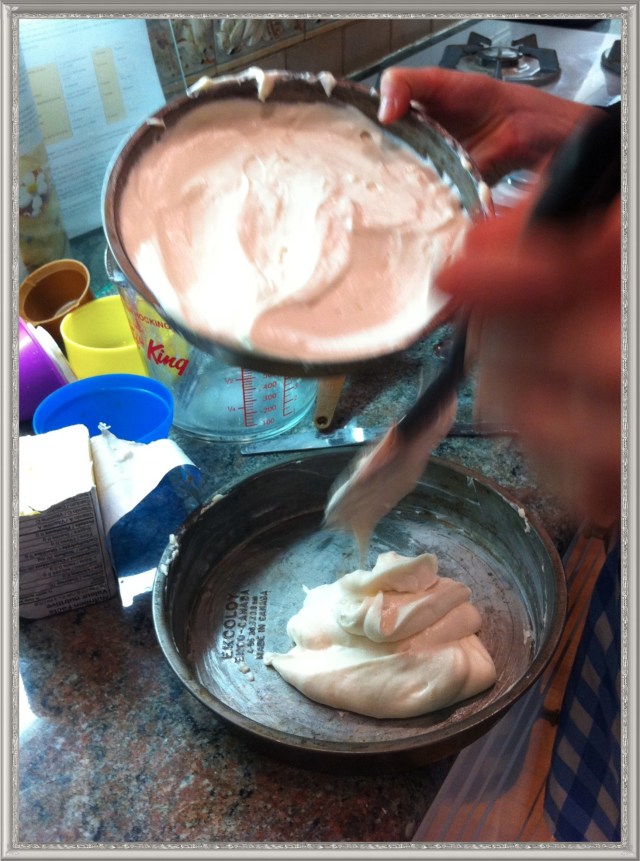
3. Reduce speed to medium. Add room temp butter, in small chunks. Beat well after each addition. Beat in vanilla. Dye buttercream your desired colour/tint. I chose a pale pink.
4. Ice cake layer by layer, being careful not to combine cake crumbs into buttercream.
Refrigerate up to 3 days or freeze in an airtight container.
My dear friend Liz and I crafted this cake together, using the White Velvet Cake recipe from Rose Beranbaum’s cookbook Rose’s Heavenly Cakes. We wanted to bake a simple, classy cake for one of our favourite amigas who also happened to be the birthday girl. We picked the recipe because who doesn’t love red velvet cake? How about making a fluffy white version instead! This cake seemed more suitably “Spring-like” as well.
White Velvet Cake
Yield: Two 9 inch round cakes. Time: 1 hour Baking Temp: 350 degrees F
Ingredients
6 large eggwhites, at room temperature
1 1/3 cup milk, at room temperature
3 teaspoons pure vanilla extract
4 cups cake flour
2 cups sugar
3 1/4 teaspoons baking powder
1 teaspoons salt
1 cup unsalted butter, softened
Directions
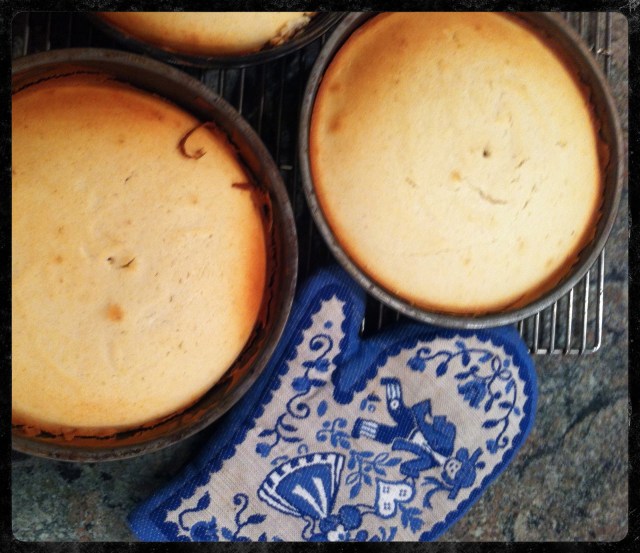
1. Butter two 9 by 2 inch round cake pan, top with a parchment round and then coat with baking spray and flour. 2. Preheat the oven to 350 degrees. Set the oven rack in the lower third of the oven. 3. In a medium bowl, whisk the egg whites, 6 tablespoons of the milk, and the vanilla just until lightly combined. 4. In the bowl of a stand mixer fitted with the flat beater, mix the flour, sugar, baking powder, and salt on low speed for 30 seconds. Add the butter and the remaining milk. Mix on low speed until the dry ingredients are moistened. Raise the speed to medium and beat for 90 seconds. Scrape down the sides of the bowl. 5. Starting on medium-low speed, gradually add the egg mixture to the batter in two parts, beating on medium speed for 30 seconds after each addition to incorporate ingredients and strengthen the structure. Scrape down the sides of the bowl. Using a large silicone spatula, scrape the batter into the prepared pan and smooth the surface evenly with a small offset spatula. 6. Bake for 30-40 minutes, or until golden brown, a wire cake tester inserted in the centre comes out clean, and the cake springs bake when pressed lightly in the center. The cake should start to shrink from the sides of the pan only after removal from the oven. 7. Let the cake cool in the pan on a wire rack for 10 minutes. Run a small metal spatula between the sides of the pan and the cake, pressing firmly against the pan, and invert the cake into a wire rack that has been coated lightly with nonstick cooking spray. To prevent splitting, reinvert the cake so that the top side is up. Cool completely. 8. Ice cake once completely cooled and add decoration as desired.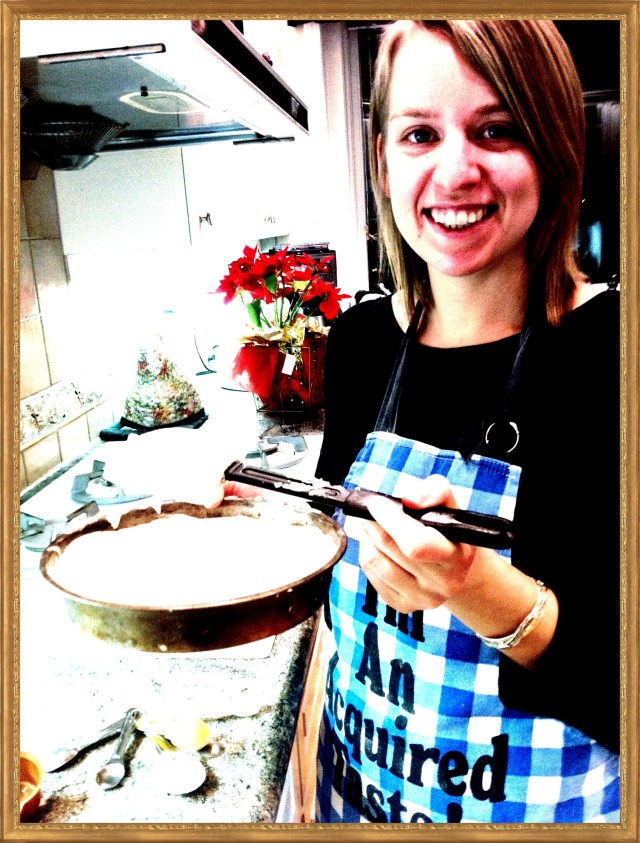
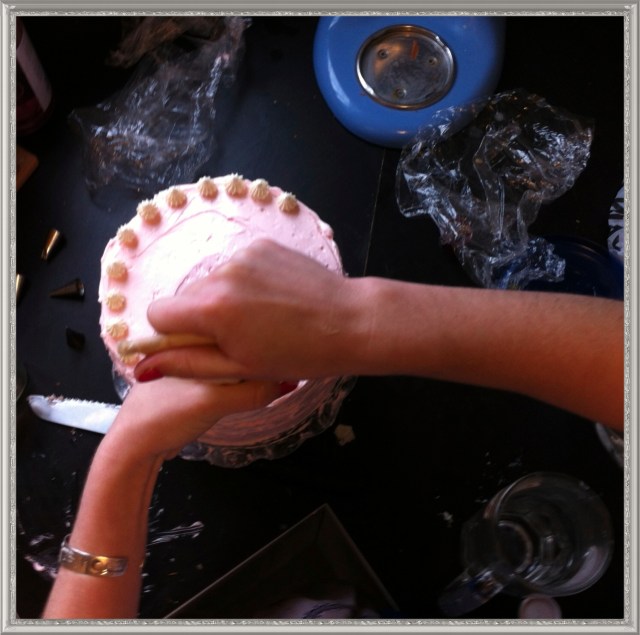
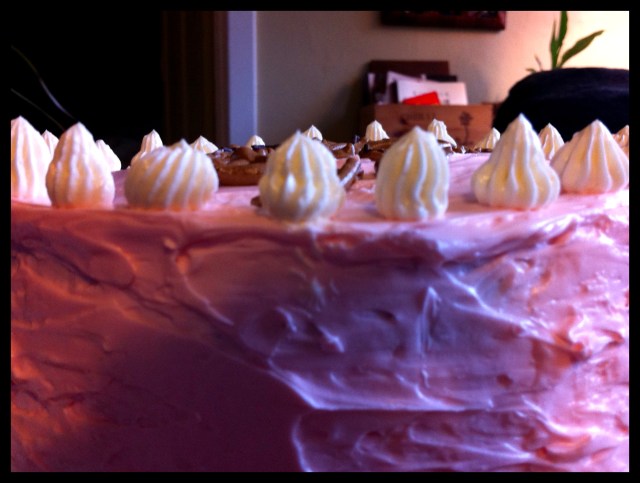


The cake was beautiful, with stiff peaks of icy perfection. It also made it to the birthday girl’s without toppling over! (phew).
Thank you Martha for your stunning inspiration and for a flawless buttercream frosting recipe. And a big hug and thank you to an amazing lady I got to spend some time with in the kitchen!
I hope you all have a great week ahead with plenty of inspiring moments yourselves.


this looks beautiful and so delicious!